Hona hemen mikrolepidopteroak nola hedatu ditudan, azkar nabarituko duzuna ez da metodo estandarra. Normalean, beste mikro-mutil batzuen itxura nahasiak edo aire puztuak jasotzen ditut, baina nire aleen kalitateak berez hitz egiten du. Metodo hau jatorriz Terry Harrisonek irakatsi zidan, ren sortzailea Microleps.org. Gehiagorako metodo estandarra ikusi hemen (.pdf).
Lehenik eta behin, ~20 mm baino txikiagoa dena deitzen ari naiz “mikroa”, honek ez du inolako eragin taxonomiko edo filogenetikorik – literalki sits txiki bat besterik ez. Dena finkatu ohi dut Nepticulidae baten tamainatik hasi eta Noctuidae txiki bat ere minutuko pinak. Leps gehienentzat tamaina bat .20 nahikoa izango da. Izugarrizko orratz isuna gordetzen dut .10 sits txikienentzako pinak; pin txikien horiek ere zailak izan ohi dira salgai aurkitzea. Noktuide txikiak (hala nola, Acontiinae eta Arctiinae batzuk – Cisthene eta Crambidia) normalean zabalera txikiko pin estandarren gainean jartzen dira – artean #000-#1. Benetan ez zait gustatzen pin baino txikiagoak erabiltzea #1 malguak direnez. Sits bat maneiatzea #000 pin barregarria da eta etiketa bat gehitzea nerbio-balentria da. Bikoitz muntatutako sits bat #3 pin transferitzeko eta etiketatzeko erraza da; ez tolestuta pin eta ez “flikak” zure alea lurruntzen dutenak. Gorputz delikatuko sits batzuek oraindik ere noizean behin tamaina estandarreko pin bat bermatuko dute… baina lep bat bikoitza muntatzea beti izan behar da hobetsitako metodoa (nire liburuan behintzat).
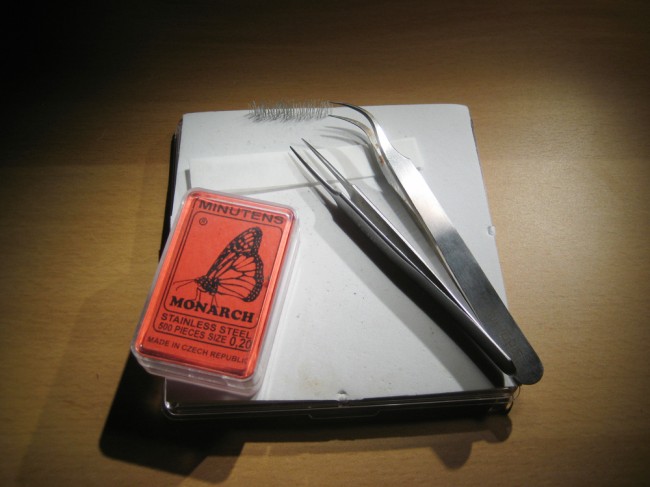
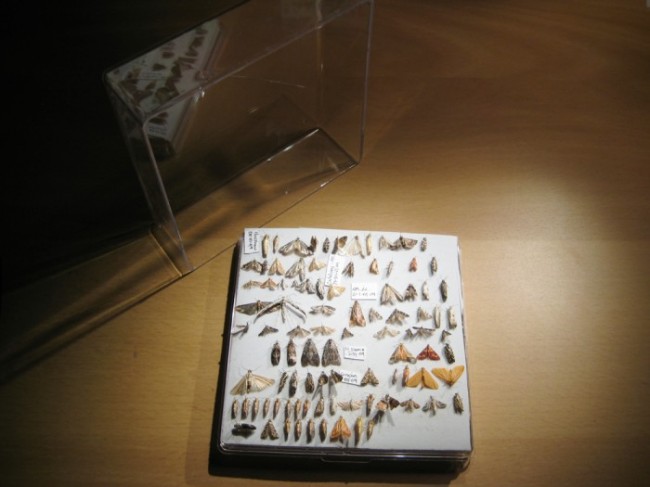
Hona hemen mikrolepsetarako nire oinarrizko tresna-kutxa.
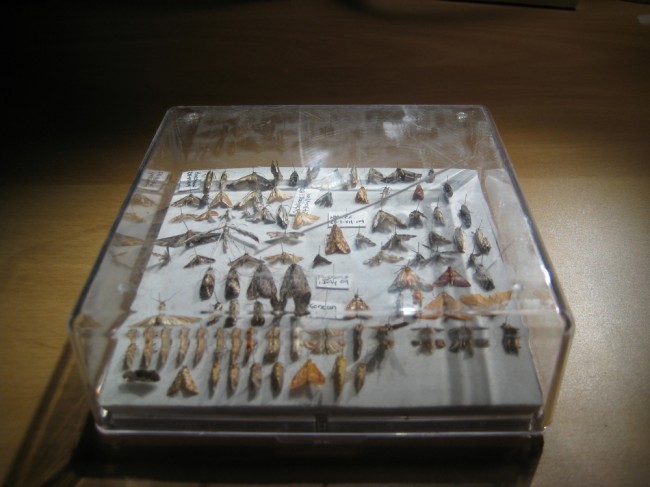
Plastikozko kaxak ere bai BioQuipetik, hala ere, aparrez forratu behar dituzu. Aurkitu dezakezun dentsitate handieneko aparra erabili behar da. Gel-apar baten xafla txiki batzuk hartu nituen atzerrian eta ez dut denborarik hartu hemen AEBetan aurkitzeko. Plastazotoa baino bi aldiz trinkoagoa da eta gainazal leunagoa du. “Polietileno gurutzatua” partida ona dela dirudi. Hala ere, zulo bat dauka eta urte gutxiren buruan ordezkatu beharko da.
Nire prozesua:
- Jarri zure sits berria zelaian minutuak erabiliz beste edozein lepidopterorekin egingo zenukeen bezala. Nire begiek hau handitzerik gabe kudea dezaketen bitartean, ez da luze beharko dut horrelako zerbait. Sitsa dortsal edo ventralki finkatu dezakezu (sitsa goitik behera dago eta bi aurreko hanken artean zorroztutako pin punta sartzen duzu). Horrek ez du alderik egiten muntaketa bikoitz batekin, zorroztu gabeko muturra ere nahiko fina baita aparra finkatzeko.
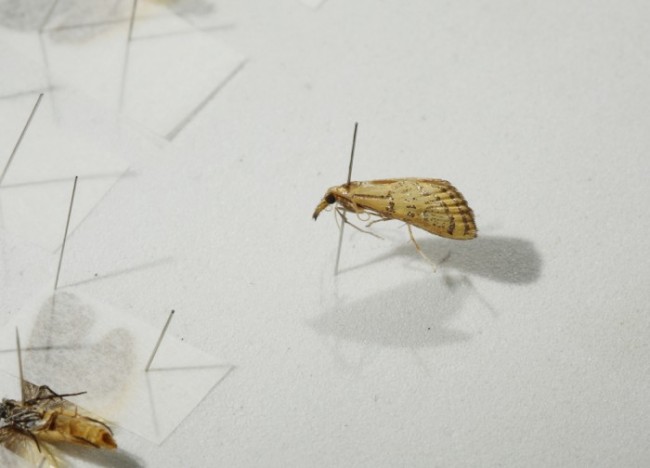
- Erlaxatu zure sitsak nire metodoa erabiliz hemen azalduta. Erabat ez da etanola erabili behar ganbaran, kopururik txikienak huts egingo du mikro bat ezin hobeto erlaxatuko. Mikro gehienak lasaitu eta heda daitezke arazo gutxirekin, eta bakarrik behar da 6-12 orduak hori lortzeko. Hala ere, sits delikatuak eta oso txikiak izan daitezke inoiz ez ale onak sortu freskoak ez badira. Ahal bazara, bildu bizirik dauden sits txikienak ontzietan, eta hurrengo egunerako erreserbatu zabaltzeko. Beirazko ontziak hobeak dira, plastikoan sor daitekeen karga estatikoak sits bat itsatsi eta ezkatak igurtzi ditzakeelako.. Bidali sits izozkailuan edo azetato tanta txiki batekin eta jarraitu.
- Puztu astiro-astiro sitsari behetik hegoak askatzeko edo aurrerantz manipulatzeko pin batekin. This is a good time to point out that sometimes spreading is not worth the risk and a “blown” open specimen such as the one below is best. If you have a solitary specimen of a tiny and delicate moth you should puff or move the wings forward and allow the static of the foam to hold them into place. This allows for a decent view of the hindwing without risking slight damage that might be caused during the mounting process.
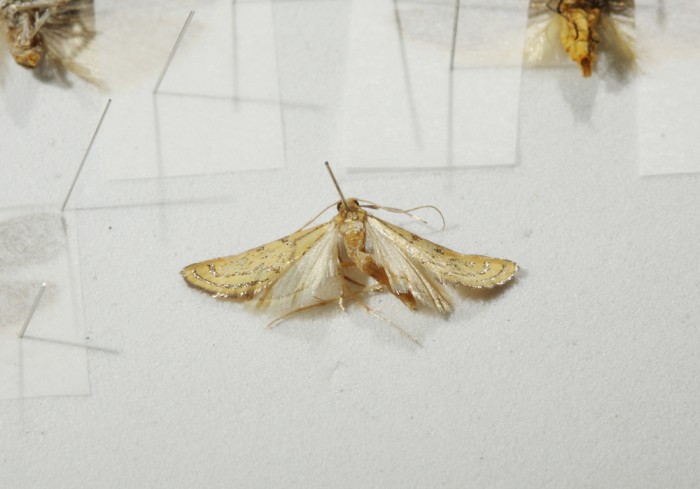
- Flip the moth upside down and position as evenly and as flush as possible to the foam. You can use larger sheets of the foam for your spreading – the clear boxes are best for field use only (especially because they start to get dirty).
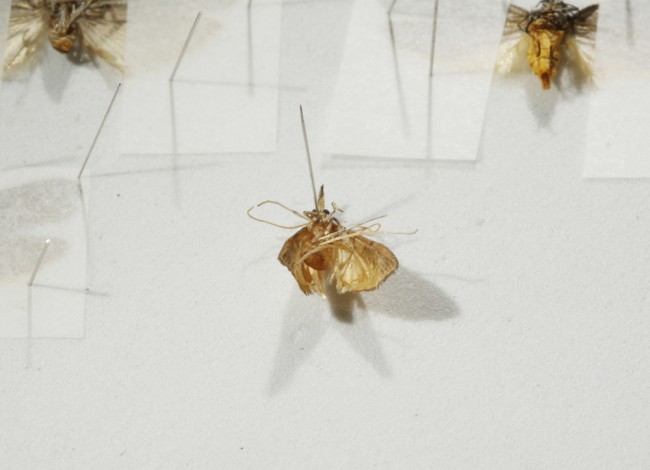
- Pin down the wings using small strips of tracing paper, just as you would on a spreading board.
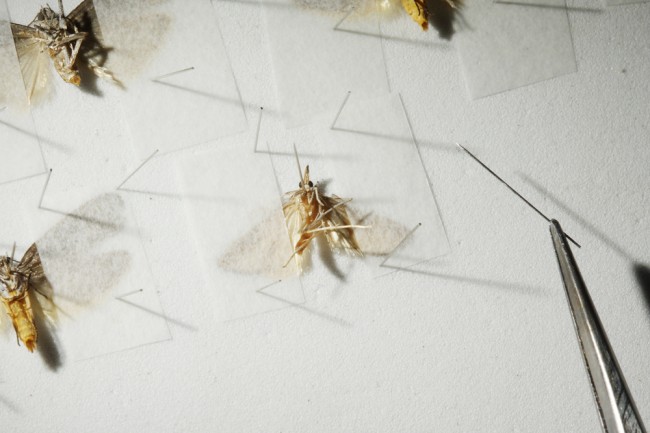
- Minutu pin bat erabiliz, zure forcep artean estuki helduta, zirikatu hegoak nahi duzun posizioan. Aurreko hegalaren kostaldeak ertz kizkur txiki bat emango du, hegala mugitzea errazten duena zulorik gehitu gabe.. Zortea baduzu, hegoak elkartuta egongo dira eta ez da atzeko hegoaren doikuntzarik beharko. Behin lekuan jarrita, eutsi papera hatzarekin eta finkatu lekuan.
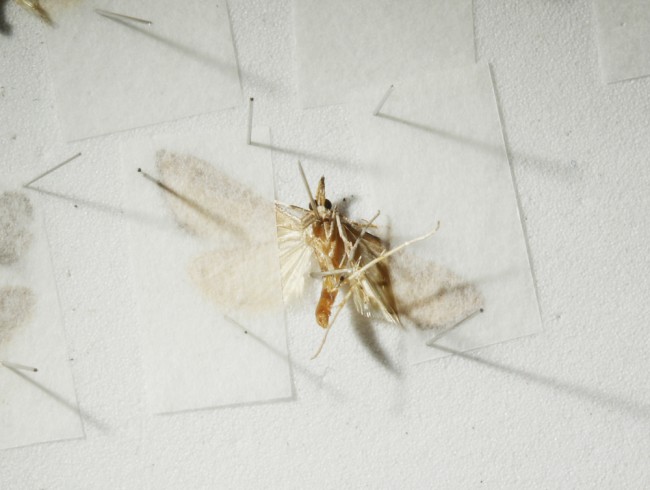
- Sitsak egun batzuk bakarrik beharko ditu lehortzeko. Beste edozein teknika bezala, praktika asko eskatzen du eta baliteke batzuentzat desiragarria ez izatea. Praktikarekin mikro bat makro bat baino azkarrago zabal dezakezu – eta oso goi mailako aleekin amaitzen da. Hala ere, Batzuek nahiago izan dezakete aparran zirrikitu txikiak moztea eta tradizionalki zabaltzea, goitik behera lep batekin gertatzen den igurtziak saihesteko.. Muntaketa trebe batek ia zero eskalak galduko ditu – normalean gertatuko litzatekeena baino ez – eta hegalean zuloak jartzea saihesten du.
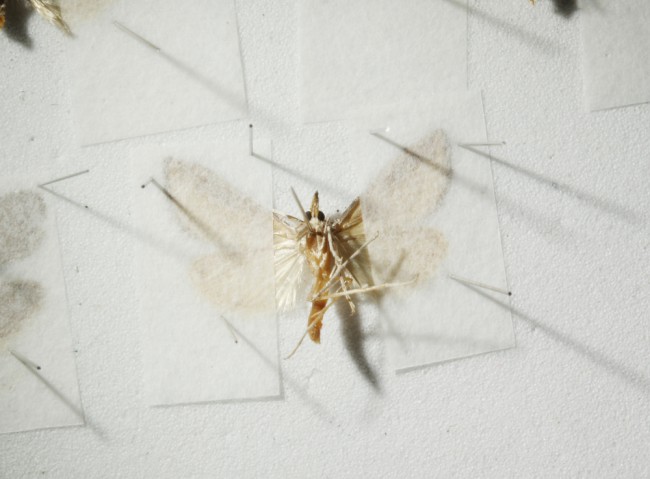
Emaitzak!
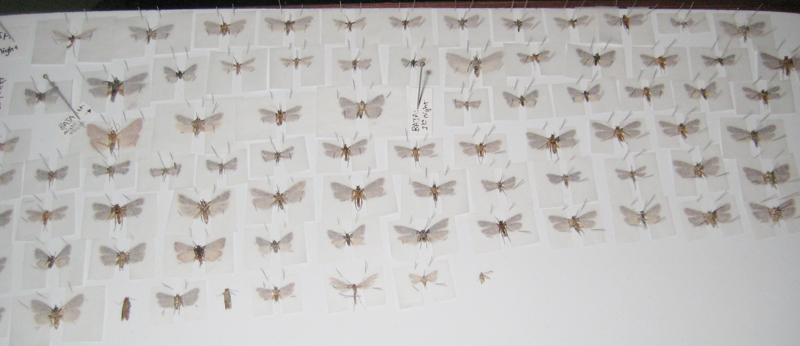
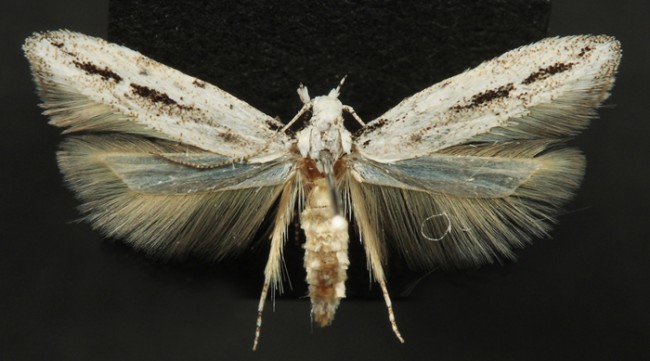
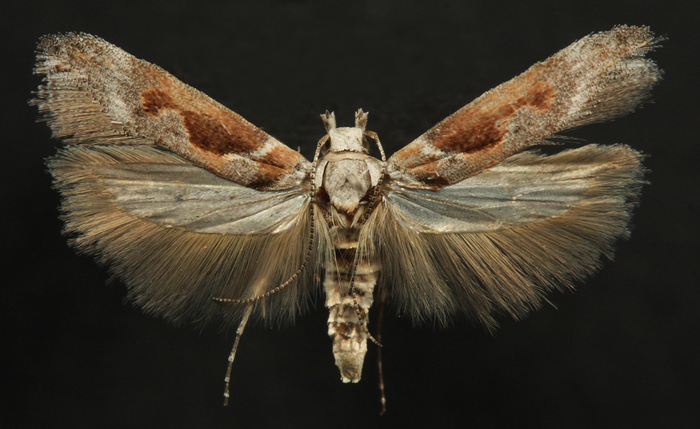

Artikulu bikaina – sitsekin jorratzen ez dudan arren, Beti interesatzen zait besteek erabiltzen dituzten teknikak ikustea.
Asko gustatzen zait zure teknika-artikulu sorta – Seguruenik, kakalardoekin antzeko zerbait egin beharko nuke.
Azalpen bikaina, Chris. Eskerrik asko hau biltzeagatik eta argitaratzeagatik.
Probatu nuen eta oso pozik nago emaitzekin. Mila esker!
Gustatuko litzaidake ATZO tutorial hau gogoratzea, ale bat txiki-txiki bihurtu aurretik, shredded smithereens, and not TODAY. After the obliterating had already taken place. Oh well, next time.
Oooh, this is SO MUCH BETTER. Practice still needed, but the obliteration is being kept to a bare minimum!
Glad you’re giving it a try! I’m excited to hear about far north leps.
Here’s the thing…I’m missing one of the most vital lep-ey pieces of equipment…a light trap. Apparently, even with 24 hour sunlight it works wel, but there just wasn’t room for shipping a proper one down. So I’m restricted to my aerial net, which is really limiting the number and type of catch I”m getting. If you have any suggestions for something I could rig up using bare-bones hardware store-type stuff as a trap, I’m all ears.
Baina, very generally, badirudi lepsak bi kategoria handitan sartzen ari direla orain arte: tximeleta txikiak (artiko motako satiroak eta pierids horiak, ninfalido batzuk), eta oraindik izenik jartzen saiatu ez naizen sits gris argi txiki asko (sitsek beldurra ematen didatelako…eta ez daukat giltzarik).
Beno, argi-tranpa bat inbutu bat duen edozein ontzi baten gainean dagoen edozein argi mota da. Argia eta energia iturria lortzea da zailena, baina hardware bakoitzak nolabaiteko UV argiak ditu. Euri asko dago hor goian? Arazo bat izan daiteke tranpatik hori husteko – baina hala ez bada, oso erraza izan beharko litzateke ontzi baten gainean inbutu moduko bat ontziratzea (papera bada ere!). Bizkor batean mailua ere egin dezakezu “larruazalea” estilo tranpa. Ideia labur bat lor dezakezu hemen: http://www.pwbelg.clara.net/mercury/case/index.html
Baina inbutu baten ordez besterik ez da 2 a egiten duten piezak / shape above a box.
If you get rain or mist then you might have to think about a cup at the bottom with a hose that sticks out the side to drain it. Not perfect but gets the job done.
And hey I’d love to help with moth ID’s! Or at least I can point you to the canadian moth people (whom you probably know?).
Hmm. I will chew on this. My main issues are 1. power source (I don’t have anything I can bring out in the field, no generator. A battery, perhaps?) 2. Definitely no UV lights here (would a regular incandescent work ok? or a coloured bulb of some kind?) 3. Rain…it rains almost every day, at least a little bit. But I’d really like to get something more than what I have (which is very, very little).
Batteries are what I use – the 12v lawnmower style. Incandescent isn’t very good, but its better than nothing. Avoid yellow/orange/red – the brighter white the better. Maybe a floodlight of some kind?
You can experiment with buckets and cups to catch the rain…my design is basically a funnel with mesh over it that drains directly out the bottom of the bucket. OR, instead of a rain drain, you can put a big tarp over the whole thing.
Pictures required! Zorte on.
I’m fairly positive this technique alone will allow me to graduate on time.
I’m a Masters student at UVA doing research on moth diversity in Shenandoah National Park. I have fifteen light traps in the forest, trapping four times between May and September. I’ll have roughly 30k specimens to identify once the last trapping session finishes, and microleps have been the bane of my pinning days. Most are in such poor condition after trapping, lying dead in the bucket until I can hike out to collect it, then freezing until I can spread them, but I can guarantee at least one side will spread well enough to ID using this instead of the standard method.
Eskerrak!
Glad I could help! Aupa – are you identifying ALL leps that come into light? Are you trying to put species names on everything? (sounds like a PhD size project!) Shoot me an e-mail if you have any further questions.
Barkatu, in the months since I posted I was busy finishing classes. With classes done, I’m refocused on my research, so I found my way back here.
We may exclude some of the obscure microlep families if we can’t do simple identification (hau da. no genital dissection). We debated morphospecies, but I don’t feel comfortable with the amount of information that could be lost, plus I find the practice too arbitrary. I have the entire collection of Moths North of Mexico at hand, so we’ll see what comes of it!
Hi. The link to your guide to relaxing moths on this page appears to be broken.
Eskerrik asko! The link should be resolved now.
Hi Chris, thanks so much for all the valuable information which has been a huge help to me. A couple of questions to clarify after reading the above. This is implied above but want to just to check:
1) Do you tend to not double-mount everything > 20 mm? In other words would you just put a #1 pin straight through the thorax like a normal insect if something is over 20 mm?
2) Are the moths that are pinned using Terry’s technique stored permanently in plastic boxes? Or at some point do you double-mount them and store them in standard insect drawers?
3) It sounds like from the text above that you relax all the moth specimens that you collect?—is this true? I was under the impression that you only need to relax specimens if they have dried out, but maybe there is some benefit to relaxing all of them regardless if they have been dead for a decent amount of time? I am used to collecting a bunch of individuals in a kill jar from blacklighting and then pinning them within 24 hours or so (the next day usually after returning home). Would you still relax them in this case?
Hi Rick-
1) Depends, I do have a small supply of thicker minuten pins from Watkins & Doncaster that I sometimes use for Pyraloids. And I usually find myself double-mounting the delicate bodied Geometridae like Sterrhinae. I sometimes switch between double mounting or using a full pin for things like Ethmia. Whatever the case I try not to ever use anything smaller than a #1 pin.
2) Most of these are just in temporary storage, so the ideal final destination is a double mount and full label. Even if it’s not spread it’s much better than not having this done! I do intend to spread some of the series if I can.
I just found the answer to question three in your response in the comments of your relaxing specimens page—so no need to answer that one! 🙂
Okay thanks Chris!
I noticed that the bodies of purchased butterflies are very dry. I previously only worked with 3 day old specimens caught in my yard. ( they were easy– no rehydrating after a night in the freezer.) As for the big bodied ones I bought, hopefully, they will rehydrate without getting moldy, after 24 hours they are bone dry in the bodies. I do not have syringes. I will try the boiling water and sponges. I believe when purchasing hairstreak butterflies they should be already spread. I did get them 3/4 spread .. not flat and when mounted they look like they are in flight. Not optimum but fairly nice. Better than breaking them I suppose.
an inverter to hook up to a car battery to supply the needed AC for the lamp works great. make sure to get one that is rated at least 50% more than the current draw from the lamp. DO NOT USE THE BATTERY IN YOUR CAR AS IF IT GETS USED TOO LONG YOU MAY NOT GET YOUR CAR STARTED!!! If you don’t mind you can keep the car running but could use a lot of gas/petrol. I have a separate battery mounted with an isolator so the car keeps it charged but I can use it until it will not power the light any more; car starts right up.
I also have a small 1Kw generator. It is roughly 30x30x30 cm or 1x1x1 foot and are fairly inexpensive to carry into areas where my jeep will not go.