Here is how I spread microlepidoptera, which you will quickly notice is not a standard method. I usually get puzzled looks or puffs of air from other micro-guys, but the quality of my specimens speaks for themselves. This method was originally taught to me by Terry Harrison, the creator of Microleps.org. For the more standard method see here (.pdf).
Firstly, I am calling everything smaller than ~20mm a “micro”, this has no taxonomic or phylogenetic bearing – literally just a small moth. I tend to pin everything from the size of a Nepticulidae to even a tiny Noctuidae on minuten pins. For the vast majority of leps a size of .20 will be sufficient. I reserve the ridiculously needle fine .10 pins for the tiniest of tiny moths; those smallest pins tend to also be difficult to find for sale. Small Noctuids (such as some Acontiinae and Arctiinae – Cisthene and Crambidia) are typically pinned on small gauge standard pins – giữa #000-#1. I have really come to dislike using pins smaller than #1 because of how flexible they are. Handling a moth on a #000 pin is ridiculous and adding a label is a nerve-racking feat. A double mounted moth with a #3 pin is easy to transfer and label; no bent pins and no “flicks” that vaporize your specimen. Some delicate bodied moths will still occasionally warrant a standard size pin… but double mounting a lep should always be the preferred method (at least in my book).
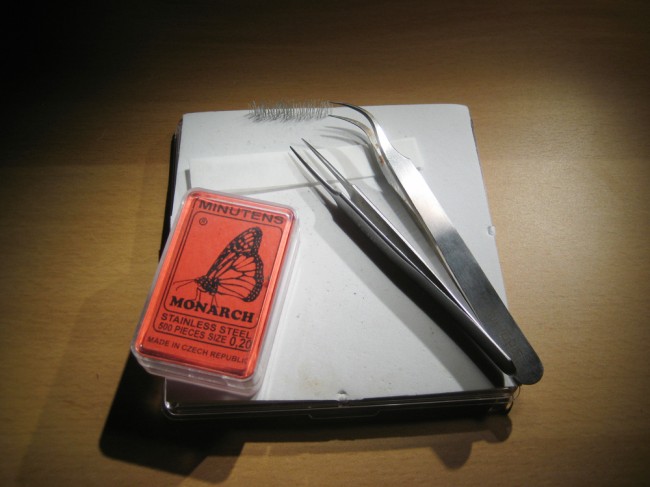
Here is my basic toolbox for microleps.
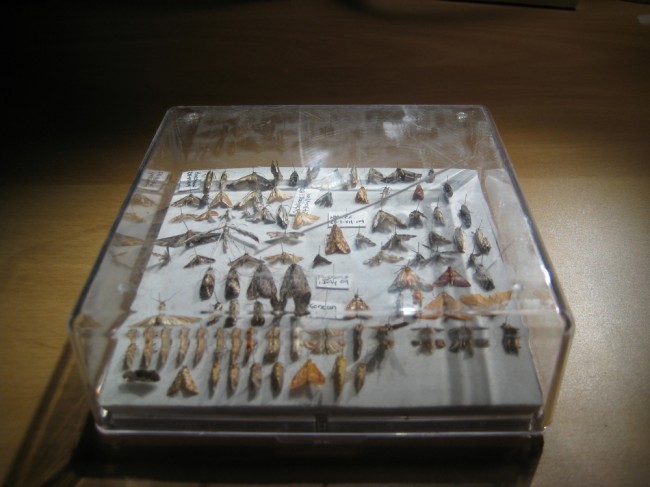
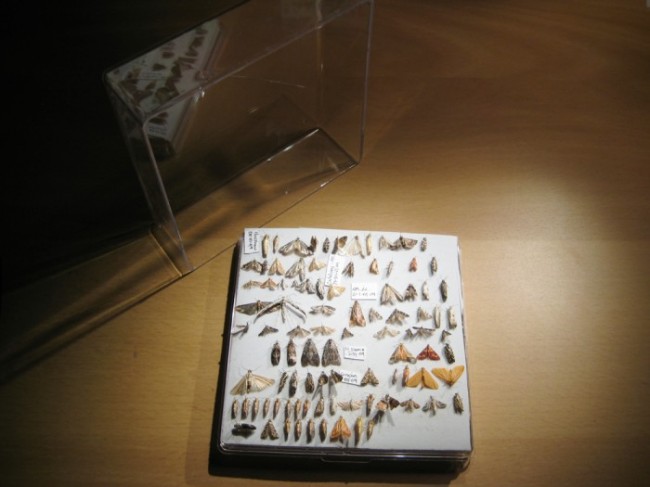
The plastic boxes are also from BioQuip, however you need to line them with foam. The highest-density foam you can find should be used. I picked up a few small sheets of a gel-foam overseas and haven’t taken the time to find it here in the US. It is twice as dense as plastazote and has a smoother surface. “Cross-linked polyethelene” seems to be a good match. It does however hold a pin hole and will need to be replaced within a few years.
My process:
- Pin your moth fresh in the field using minutens just as you would for any other lepidoptera. While my eyes can manage this without magnification to date, it won’t be long before I need something like this. You can pin the moth dorsally or ventrally (the moth is upside down and you insert the sharpened pin tip between the two forelegs). This makes no difference with a double mount since even the unsharpened end is fine enough for pinning into foam.
- Relax your moths using my method described here. Absolutely no ethanol should be used in the chamber, the smallest amount will fail to perfectly relax a micro. Most micros can be relaxed and spread with little problem, and it takes only 6-12 hours to achieve this. Tuy nhiên, delicate and very small moths may never create good specimens if they are not fresh. If you are at all able, collect the smallest moths alive in vials, and reserve for the next day to spread. Glass vials are preferable because the static charge that can build in plastic may cause a moth to cling and rub scales. Dispatch of the moth in your freezer or with a tiny drop of acetate and proceed.
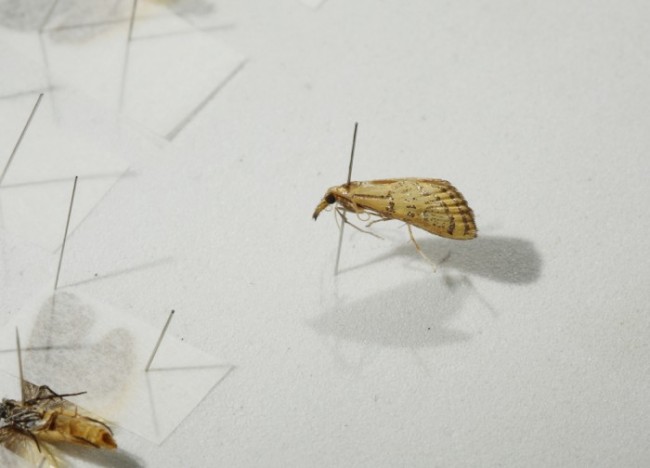
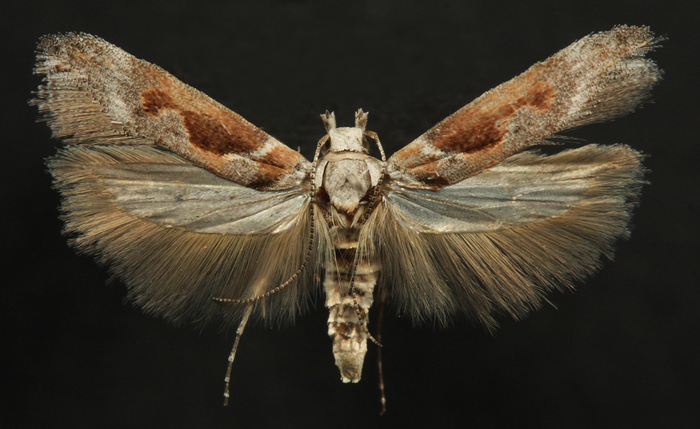
- Gently puff on your moth from below to loosen the wings or manipulate them forward with a pin. This is a good time to point out that sometimes spreading is not worth the risk and a “blown” open specimen such as the one below is best. If you have a solitary specimen of a tiny and delicate moth you should puff or move the wings forward and allow the static of the foam to hold them into place. This allows for a decent view of the hindwing without risking slight damage that might be caused during the mounting process.
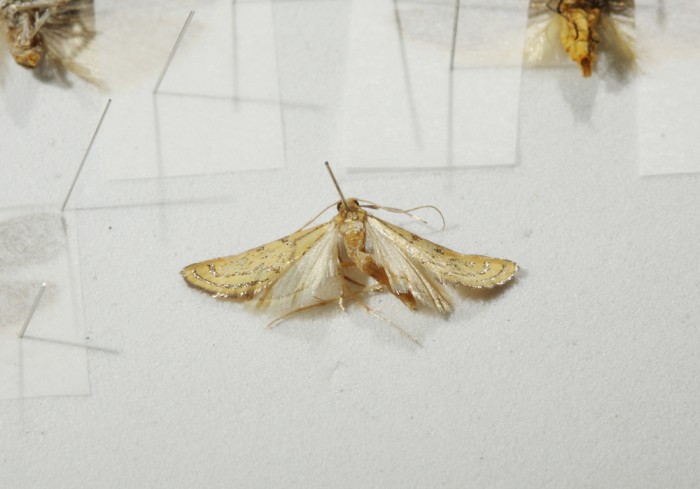
- Flip the moth upside down and position as evenly and as flush as possible to the foam. You can use larger sheets of the foam for your spreading – the clear boxes are best for field use only (especially because they start to get dirty).
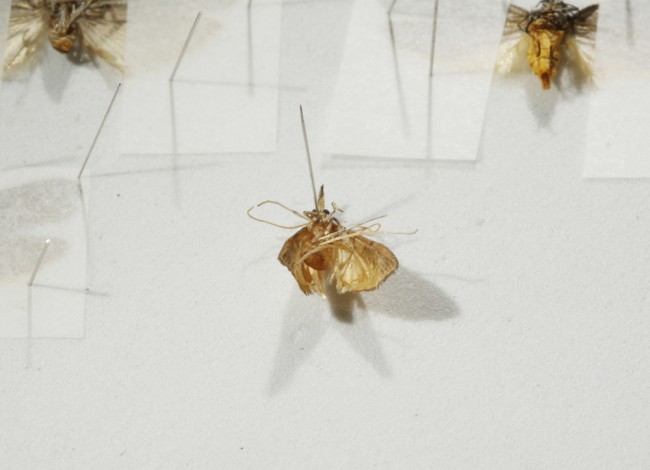
- Pin down the wings using small strips of tracing paper, just as you would on a spreading board.
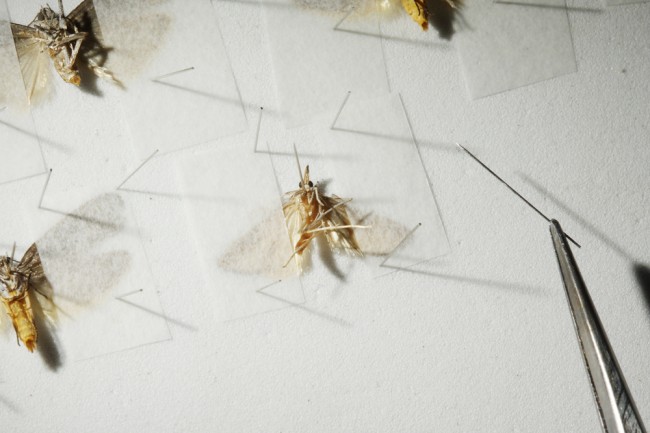
- Using a minuten pin gripped tightly between your forceps, tease the wings into the desired position. The costa of the forewing will provide a small curled ridge that very easily facilitates moving the wing without adding any holes. If you are lucky the wings will remain coupled and no adjustment of the hindwing will be required. Once in place hold the paper down with your finger and pin it into place.
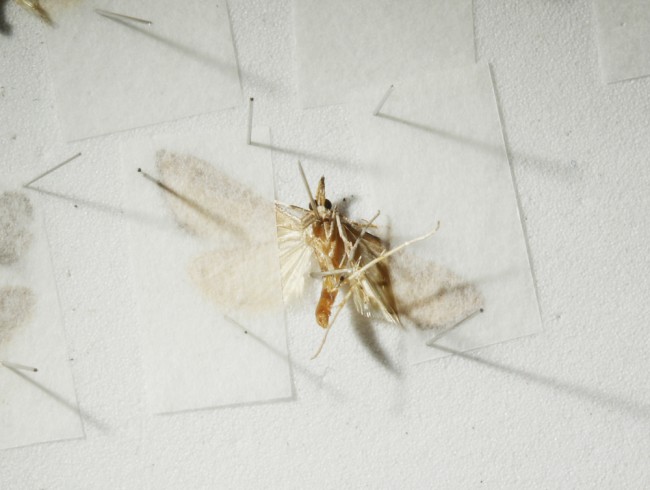
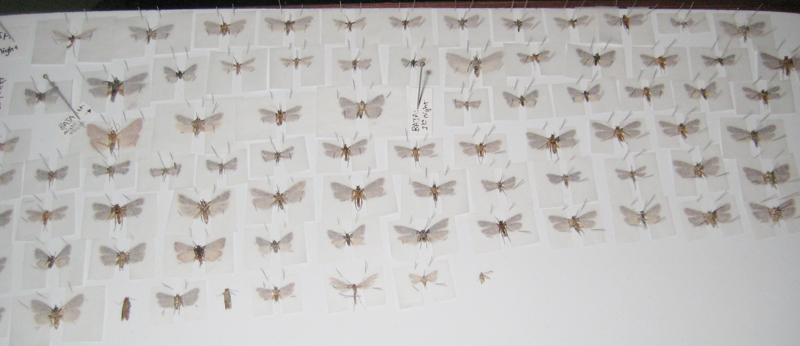
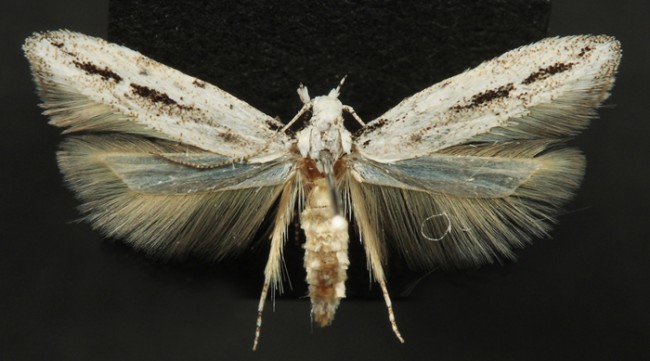
- The moth will only take a few days to dry. Just as any other technique this takes lots of practice and may not be desirable for some. With practice you can spread a micro faster than a macro – and end up with far superior specimens. Tuy nhiên, some people may prefer cutting tiny grooves into the foam and spreading traditionally to avoid any rubbing that occurs with an upside-down lep. A skilled mount will lose almost zero scales – nothing more than what would happen normally – and it avoids putting holes in the wing.
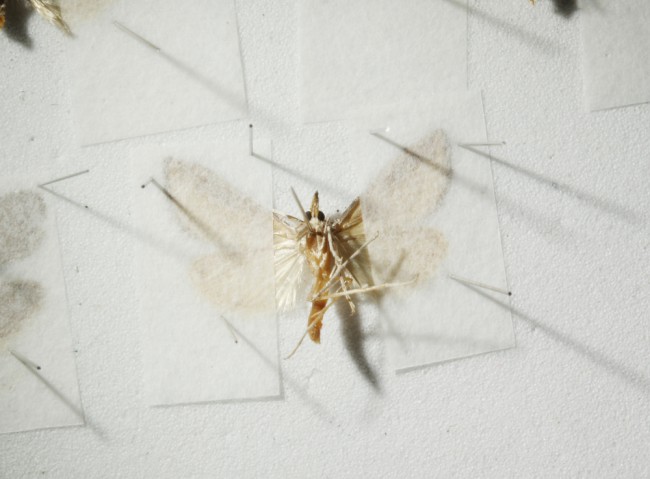
Kết quả!

Great article – even though I don’t deal with moths, I’m always interested in seeing the techniques others are using.
I really like your series of techniques articles – I probably ought to do something similar for beetles.
Excellent explanation, Chris. Thanks for putting this together and posting it.
I tried it and am very pleased with the results. Thanks alot!
I wish I’d remembered this tutorial YESTERDAY, before I obliterated a specimen into tiny, shredded smithereens, and not TODAY. After the obliterating had already taken place. Oh well, next time.
Oooh, this is SO MUCH BETTER. Practice still needed, but the obliteration is being kept to a bare minimum!
Glad you’re giving it a try! I’m excited to hear about far north leps.
Here’s the thing…I’m missing one of the most vital lep-ey pieces of equipment…a light trap. Rõ ràng, even with 24 hour sunlight it works wel, but there just wasn’t room for shipping a proper one down. So I’m restricted to my aerial net, which is really limiting the number and type of catch I”m getting. If you have any suggestions for something I could rig up using bare-bones hardware store-type stuff as a trap, I’m all ears.
Tuy nhiên,, very generally, the leps seem to be falling into two broad categories so far: smallish butterflies (arctic-type satyirds and yellow pierids, some nymphalids), and lots of tiny light grey moths which I haven’t tried to put a name to yet (because moths scare me…and I have no keys).
Well a light trap is any sort of light above any sort of bucket with a funnel. Getting the light and power source is the hardest thing, but every hardware has UV lights of some sort. Is there much rain up there? It may be a problem draining that from the trap – but if not then it should be really easy to jerry-rig some sort of funnel over a bucket (even if it’s paper!). You can also hammer together a quick “skinner” style trap. You can get a rough idea here: http://www.pwbelg.clara.net/mercury/case/index.html
But instead of a funnel it’s just 2 pieces that make a / shape above a box.
If you get rain or mist then you might have to think about a cup at the bottom with a hose that sticks out the side to drain it. Not perfect but gets the job done.
And hey I’d love to help with moth ID’s! Or at least I can point you to the canadian moth people (whom you probably know?).
Hmm. I will chew on this. My main issues are 1. power source (I don’t have anything I can bring out in the field, no generator. A battery, perhaps?) 2. Definitely no UV lights here (would a regular incandescent work ok? or a coloured bulb of some kind?) 3. Rain…it rains almost every day, at least a little bit. But I’d really like to get something more than what I have (which is very, very little).
Batteries are what I use – the 12v lawnmower style. Incandescent isn’t very good, but its better than nothing. Avoid yellow/orange/red – the brighter white the better. Maybe a floodlight of some kind?
You can experiment with buckets and cups to catch the rain…my design is basically a funnel with mesh over it that drains directly out the bottom of the bucket. OR, instead of a rain drain, you can put a big tarp over the whole thing.
Pictures required! Chúc may mắn.
I’m fairly positive this technique alone will allow me to graduate on time.
I’m a Masters student at UVA doing research on moth diversity in Shenandoah National Park. I have fifteen light traps in the forest, trapping four times between May and September. I’ll have roughly 30k specimens to identify once the last trapping session finishes, and microleps have been the bane of my pinning days. Most are in such poor condition after trapping, lying dead in the bucket until I can hike out to collect it, then freezing until I can spread them, but I can guarantee at least one side will spread well enough to ID using this instead of the standard method.
Cảm ơn!
Glad I could help! wow – are you identifying ALL leps that come into light? Are you trying to put species names on everything? (sounds like a PhD size project!) Shoot me an e-mail if you have any further questions.
Xin lỗi, in the months since I posted I was busy finishing classes. With classes done, I’m refocused on my research, so I found my way back here.
We may exclude some of the obscure microlep families if we can’t do simple identification (ví dụ:. no genital dissection). We debated morphospecies, but I don’t feel comfortable with the amount of information that could be lost, plus I find the practice too arbitrary. I have the entire collection of Moths North of Mexico at hand, so we’ll see what comes of it!
Chào. The link to your guide to relaxing moths on this page appears to be broken.
Cảm ơn bạn! The link should be resolved now.
Xin chào Chris, thanks so much for all the valuable information which has been a huge help to me. A couple of questions to clarify after reading the above. This is implied above but want to just to check:
1) Do you tend to not double-mount everything > 20 mm? In other words would you just put a #1 pin straight through the thorax like a normal insect if something is over 20 mm?
2) Are the moths that are pinned using Terry’s technique stored permanently in plastic boxes? Or at some point do you double-mount them and store them in standard insect drawers?
3) It sounds like from the text above that you relax all the moth specimens that you collect?—is this true? I was under the impression that you only need to relax specimens if they have dried out, but maybe there is some benefit to relaxing all of them regardless if they have been dead for a decent amount of time? I am used to collecting a bunch of individuals in a kill jar from blacklighting and then pinning them within 24 hours or so (the next day usually after returning home). Would you still relax them in this case?
Hi Rick-
1) Depends, I do have a small supply of thicker minuten pins from Watkins & Doncaster that I sometimes use for Pyraloids. And I usually find myself double-mounting the delicate bodied Geometridae like Sterrhinae. I sometimes switch between double mounting or using a full pin for things like Ethmia. Whatever the case I try not to ever use anything smaller than a #1 pin.
2) Most of these are just in temporary storage, so the ideal final destination is a double mount and full label. Even if it’s not spread it’s much better than not having this done! I do intend to spread some of the series if I can.
I just found the answer to question three in your response in the comments of your relaxing specimens page—so no need to answer that one! 🙂
Okay thanks Chris!
I noticed that the bodies of purchased butterflies are very dry. I previously only worked with 3 day old specimens caught in my yard. ( they were easy– no rehydrating after a night in the freezer.) As for the big bodied ones I bought, hy vọng, they will rehydrate without getting moldy, after 24 hours they are bone dry in the bodies. I do not have syringes. I will try the boiling water and sponges. I believe when purchasing hairstreak butterflies they should be already spread. I did get them 3/4 spread .. not flat and when mounted they look like they are in flight. Not optimum but fairly nice. Better than breaking them I suppose.
an inverter to hook up to a car battery to supply the needed AC for the lamp works great. make sure to get one that is rated at least 50% more than the current draw from the lamp. DO NOT USE THE BATTERY IN YOUR CAR AS IF IT GETS USED TOO LONG YOU MAY NOT GET YOUR CAR STARTED!!! If you don’t mind you can keep the car running but could use a lot of gas/petrol. I have a separate battery mounted with an isolator so the car keeps it charged but I can use it until it will not power the light any more; car starts right up.
I also have a small 1Kw generator. It is roughly 30x30x30 cm or 1x1x1 foot and are fairly inexpensive to carry into areas where my jeep will not go.